Notice: A non well formed numeric value encountered in /home/srv33763/domains/emilwypych.com/public_html/wp-content/plugins/crayon-syntax-highlighter/crayon_formatter.class.php on line 118
Notice: A non well formed numeric value encountered in /home/srv33763/domains/emilwypych.com/public_html/wp-content/plugins/crayon-syntax-highlighter/crayon_formatter.class.php on line 119
Jenkins is a great tool for automation and building the Continuous Integration and Continuous Delivery/Deployment (whatever you want) systems. But the more jobs you create, the more complicated Jenkins will be. Hence you should have some tools for monitoring whether everything is ok. The most basic way to monitor Jenkins’ jobs is e-mail notification. More and more companies choose Office365 as their e-mail service. Today I will show you how to configure Jenkins e-mail notification with Office365 because it’s not so obvious as you may think.
I don’t want to show you how to configure and run Post Build Publisher, I will just focus on Email-ext Plugin configuration to work with Office365. There are many tutorials showing the basic configuration. Unfortunately, Email-ext Plugin is not prepared by design to work with Exchange servers. In the configuration section you can, of course, choose whether you want to use SSL connection or not. But Exchange server requires the TLS, which is not the same as SSL.
Jenkins e-mail notification with Office365
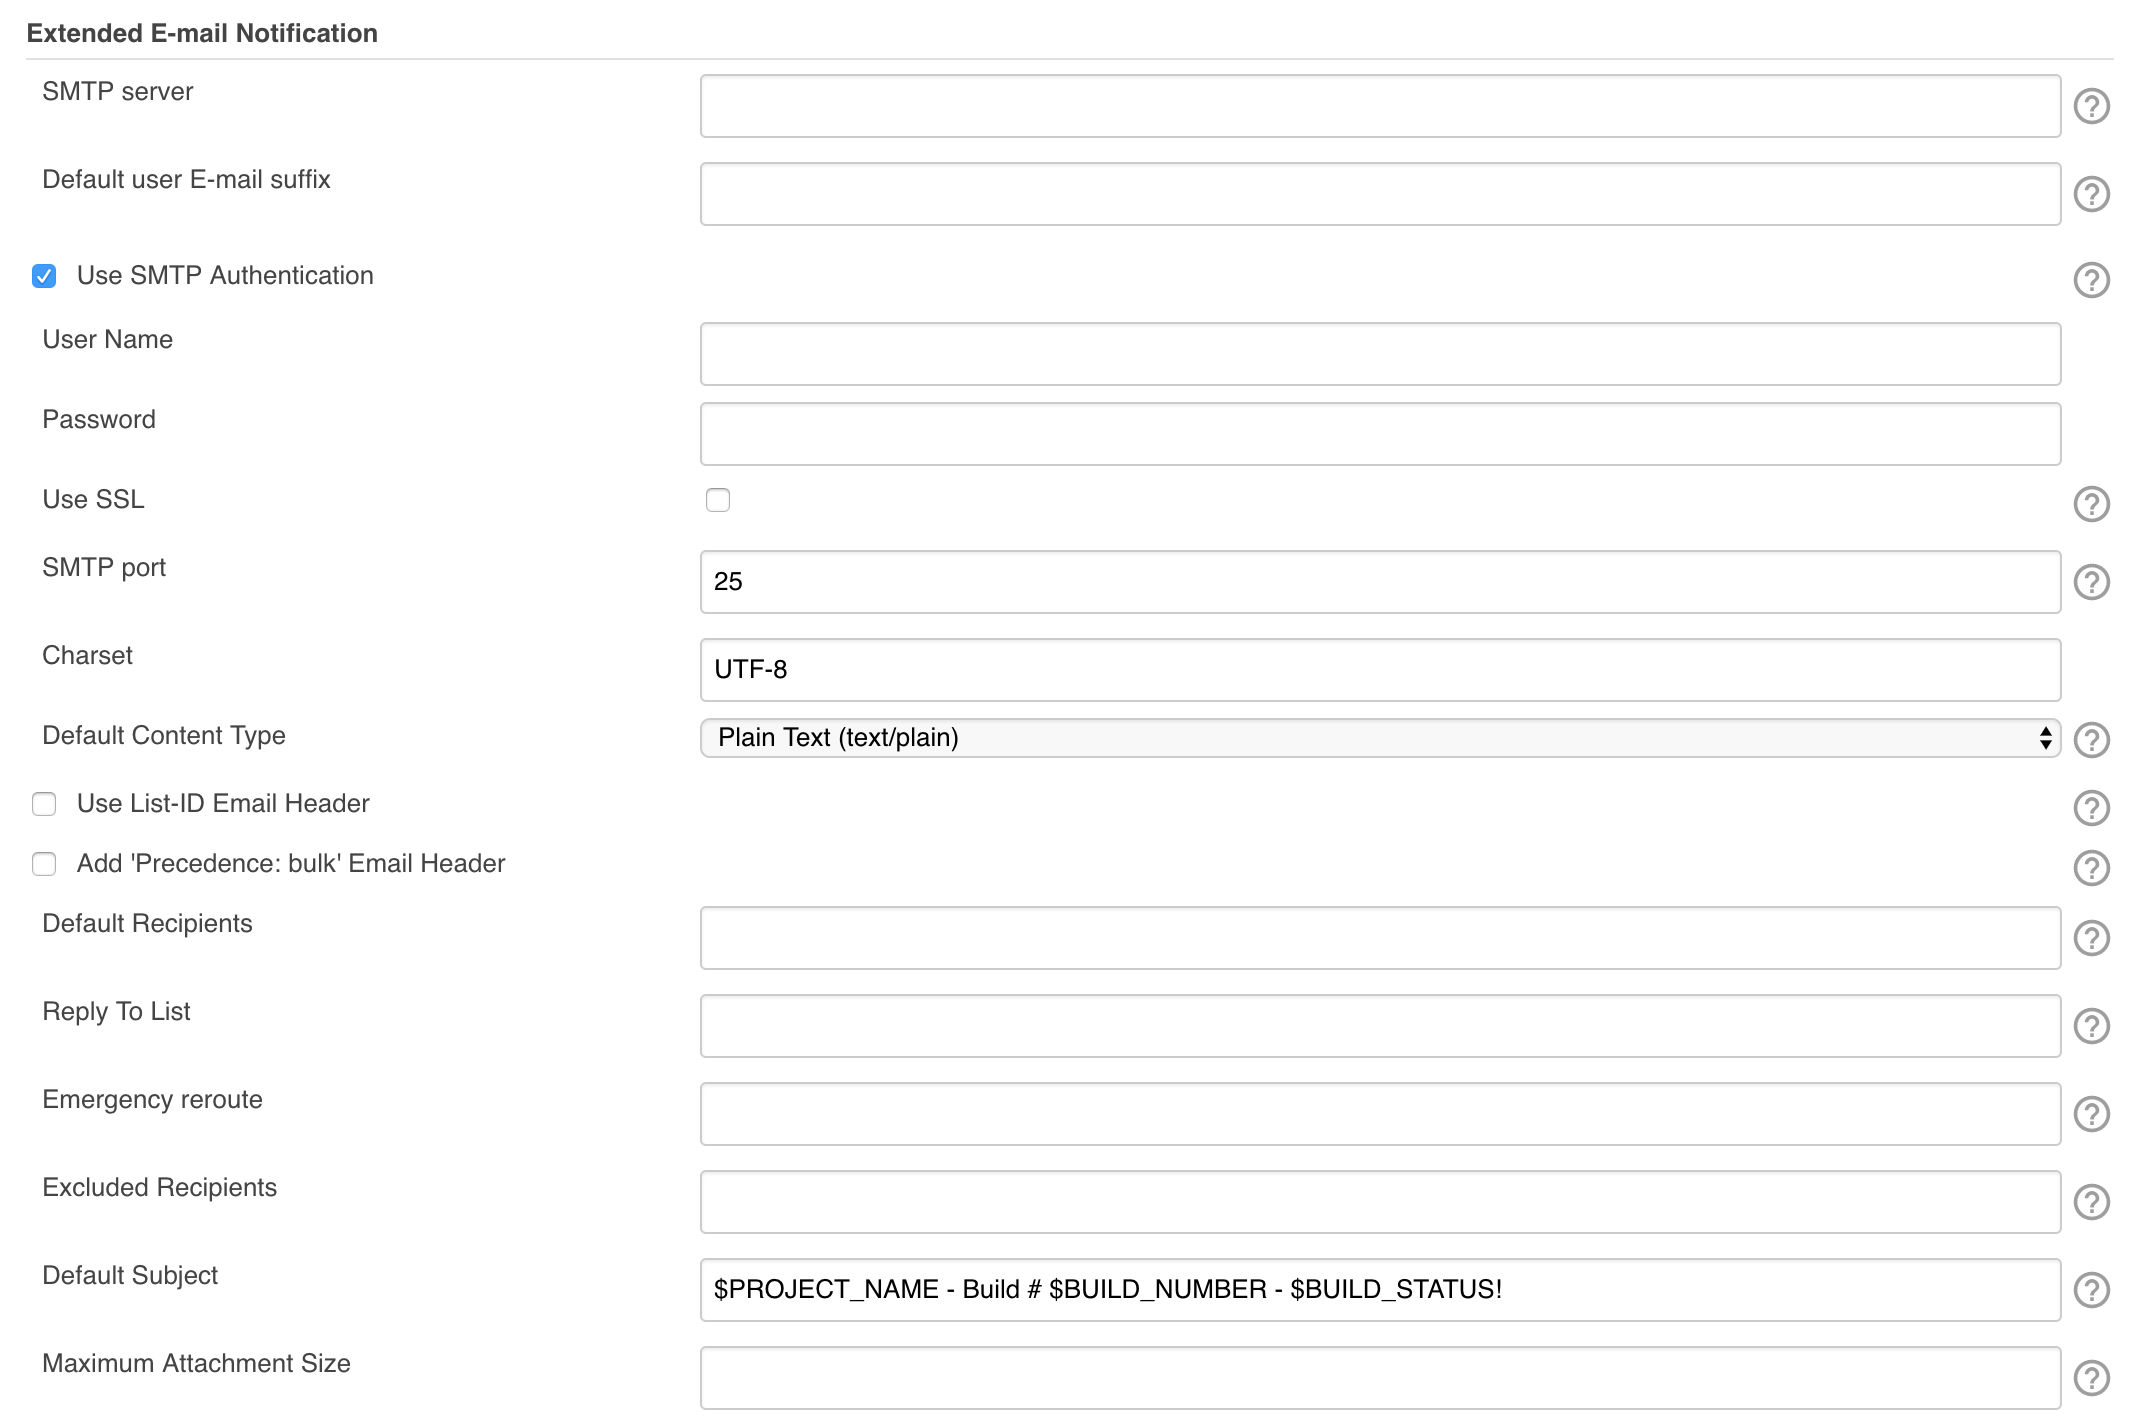
First, please take a look at the configuration section:

As you can see it’s not difficult. Moreover, you can configure it without any preparation – if you can use any SMTP server working on port 25 or 465 (with SMTPS). Exchange servers mostly work on 578 port and use TLS instead of SSL. If you check the “SSL” checkbox in the Jenkins configuration, it won’t work with Office365. You HAVE TO ensure that connection uses TLS. But how you can do that?
Enable TLS in Jenkins
Unfortunately, to enable TLS, you need to run Jenkins with the relevant argument. First, find one of the following paths, depending on your operating system.
Debian/Ubuntu:
|
1 |
/etc/defaults/jenkins |
RedHat/CentOS:
|
1 |
/etc/sysconfig/jenkins |
Now you should find one of these lines, depending on your OS again:
Debian/Ubuntu:
|
1 |
JAVA_ARGS="-Djava.awt.headless=true" |
RedHat/CentOS:
|
1 |
JENKINS_JAVA_OPTIONS="-Djava.awt.headless=true" |
After you find it, add the parameter which will force using the TLS:
|
1 2 3 4 5 |
# Debian/Ubuntu JAVA_ARGS="-Djava.awt.headless=true -Dmail.smtp.starttls.enable=true" # RedHat/CentOS JENKINS_JAVA_OPTIONS="-Djava.awt.headless=true -Dmail.smtp.starttls.enable=true" |
And now you just need to restart your Jenkins, and after that, Jenkins e-mail notification with Office365 will work properly. But! Of course, you also need to configure the Email-ext Plugin, because, without it, Jenkins won’t know which SMTP server it should use.
Extended E-mail notification configuration
It is a very fast tutorial. First, go to the Manage Jenkins -> Configure System, and find here the section named “Extended E-mail Notification”. Type here the necessary configuration. To be clear – here I explain how to send e-mail using SMTP client submission! If you want to send e-mail via direct send, please note that configuration should be different than below.
- SMTP server: smtp.office365.com
Next, click the “Advanced” button and check the “Use SMTP Authentication” checkbox. Now you need to type username and password of the Office365 account. For example:
- User Name: [email protected]
- Password: somePa$$word
- SMTP Port: 587
And it is the high time tell you one very important thing.
Do not check SSL box!
No, please don’t do that. You have just run Jenkins with enabled StartTLS, so you do not need the SSL in your configuration. Moreover, if you check that, your connection won’t work properly. So please remember this one thing – don’t check that under any circumstances. After all those configuration steps you can try to send your first notification. Enyoj!
I am using Jenkins by deploying Jenkins.war in webapps folder. In this where should I add
JENKINS_JAVA_OPTIONS=”-Djava.awt.headless=true”
Assuming that you use a Tomcat, you should (AFAIK) put to $TOMCAT_INSTALLATION/bin/setenv.sh something like that:
export JAVA_OPTS="$JAVA_OPTS -Djava.awt.headless=true"alternatively you can use /etc/default/tomcat7 (or other file according to which user run the Tomcat) and set something like this:
JAVA_OPTS="$JAVA_OPTS -Djava.awt.headless=true"How does one enable TLS if running Jenkins on Windows 10?
Unfortunately, I have no idea. 🙁 To be honest, I’ve never worked with Jenkins on Windows (especially on Windows 10). I’ve just only used Windows as a slave.