 There are many bad things which can happen during the infrastructure upgrade. Sometimes it is caused by a sysadmin mistake, sometimes it may be a software bug, but it really does not matter what the main reason is. You must fix it. Nowadays we have much easier job than – for instance – twenty years ago. Now we have Google, lots of blogs and other pages with millions of information. However, we should follow the way created on our own. Take a look on this scenario:
Problem
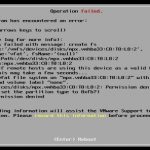
Classical vSphere infrastructure upgrade (in that case from 5.5 U3 version to the 6.0 U2). A new baseline in the vSphere Update Manager was created. Then ESXi image was imported and the baseline was attached to the hosts. Upgrade started, the first ESXi was rebooted and a problem appeared there. It took much more time than expected to start the ESXi, so I decided to check what is going on, using iLO. What did I see? That scary thing:
Solution
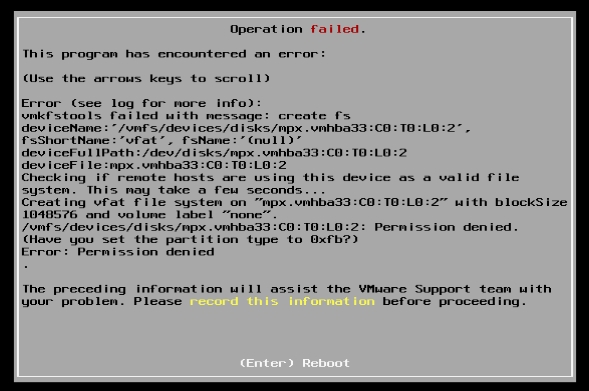
At first I should explain that the ESXi, which was upgraded, boots up from the USB key. ESXi upgrade permission denied error (as I know) appears only with the USB key or SD card as the boot device. As you can see in the screenshot, ESXi had no permission to write on the second partition. I found one solution to this problem (with the explanation why this error appeared) on the Dell Community Techcenter. It says:
During upgrade, the installer see the partition #2 and it tries to format it as vfat thinking that it’s a scratch partition.
Unfortunately, as you can see below, ESXi installer could not write to that partition, because it was a coredump partition. Refer to VMware KB 2004299 coredump partition “is used to capture the output of a purple diagnostic screen in the event of an ESXi host failure”. So it is possible that during the ESXi upgrade permission denied error can occur if you have the coredump partition configured on the second partition. Unfortunately in my case the solution with a simple change of the coredump partition did not work. I got a “Connect to localhost failed: Connection failure” error when I was trying to use any esxcli command. So I had to use the low-level method – partedUtil.
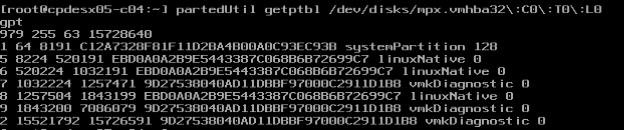
As you can see below, in my case there was the coredump partition on a second partition of the USB key:
How to remove the coredump partition
Look at the last position – partition with number 2 was set as a vmkDiagnostic. It informed me that it was the coredump partition. Also, there were two another coredump partitions. Their partition numbers were 7 and 9 (few months ago I set them up with a PowerCLI script). The truth is, I do not know why there were three coredump partitions – maybe I made a mistake, maybe it was caused by ESXi installer during the upgrade or something else. I still have not found the reason – but I needed to remove one of the partitions. This partition was of course the one with number 2. I used the partedUtil again (you can read more about this tool on the VMware KB 1036609) for removing the unwanted partition:
[root@esxi:~] partedUtil delete <DEVICE> <PARTITION_NUMBER>
[root@esxi:~] partedUtil delete /vmfs/devices/disks/mpx.vmhba32\:C0\:T0\:L0 2
After that I rebooted ESXi and waited for the effects. My patience was awarded with this screen:
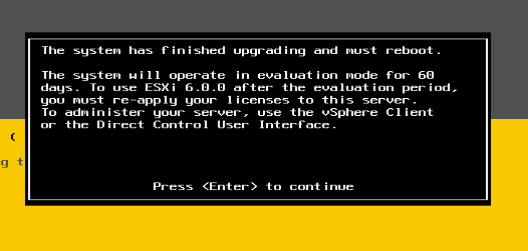
As you can see, during the ESXi upgrade permission denied problem a nasty problem can appear, but it is relatively easy to resolve. Depending on situation you can use esxcli for reassign the coredump partition (recommended if you have only one set up) or just remove it with the partedUtill tool. At the end of the post you can find a list of pages which contain useful information about this problem, and which were very helpful to me.
Bibliography: